Add Calculations Components to a Form
This guide explains how to enable and configure Calculations Components in a form within a project workflow. These components allow you to compute values based on form inputs or other project/global variables—useful for budgeting, cost validations, and more.
When to Add a Calculations Component
You should add a Calculations Component when:
- You need to calculate totals or subtotals based on user input.
- You want to validate data against budget thresholds or financial limits.
- Your project requires additional cost breakdowns (e.g., tax, fees, or per-unit cost).
This feature must be enabled at the organizational level to appear in the Form Builder.
To Enable and Add a Calculations Component
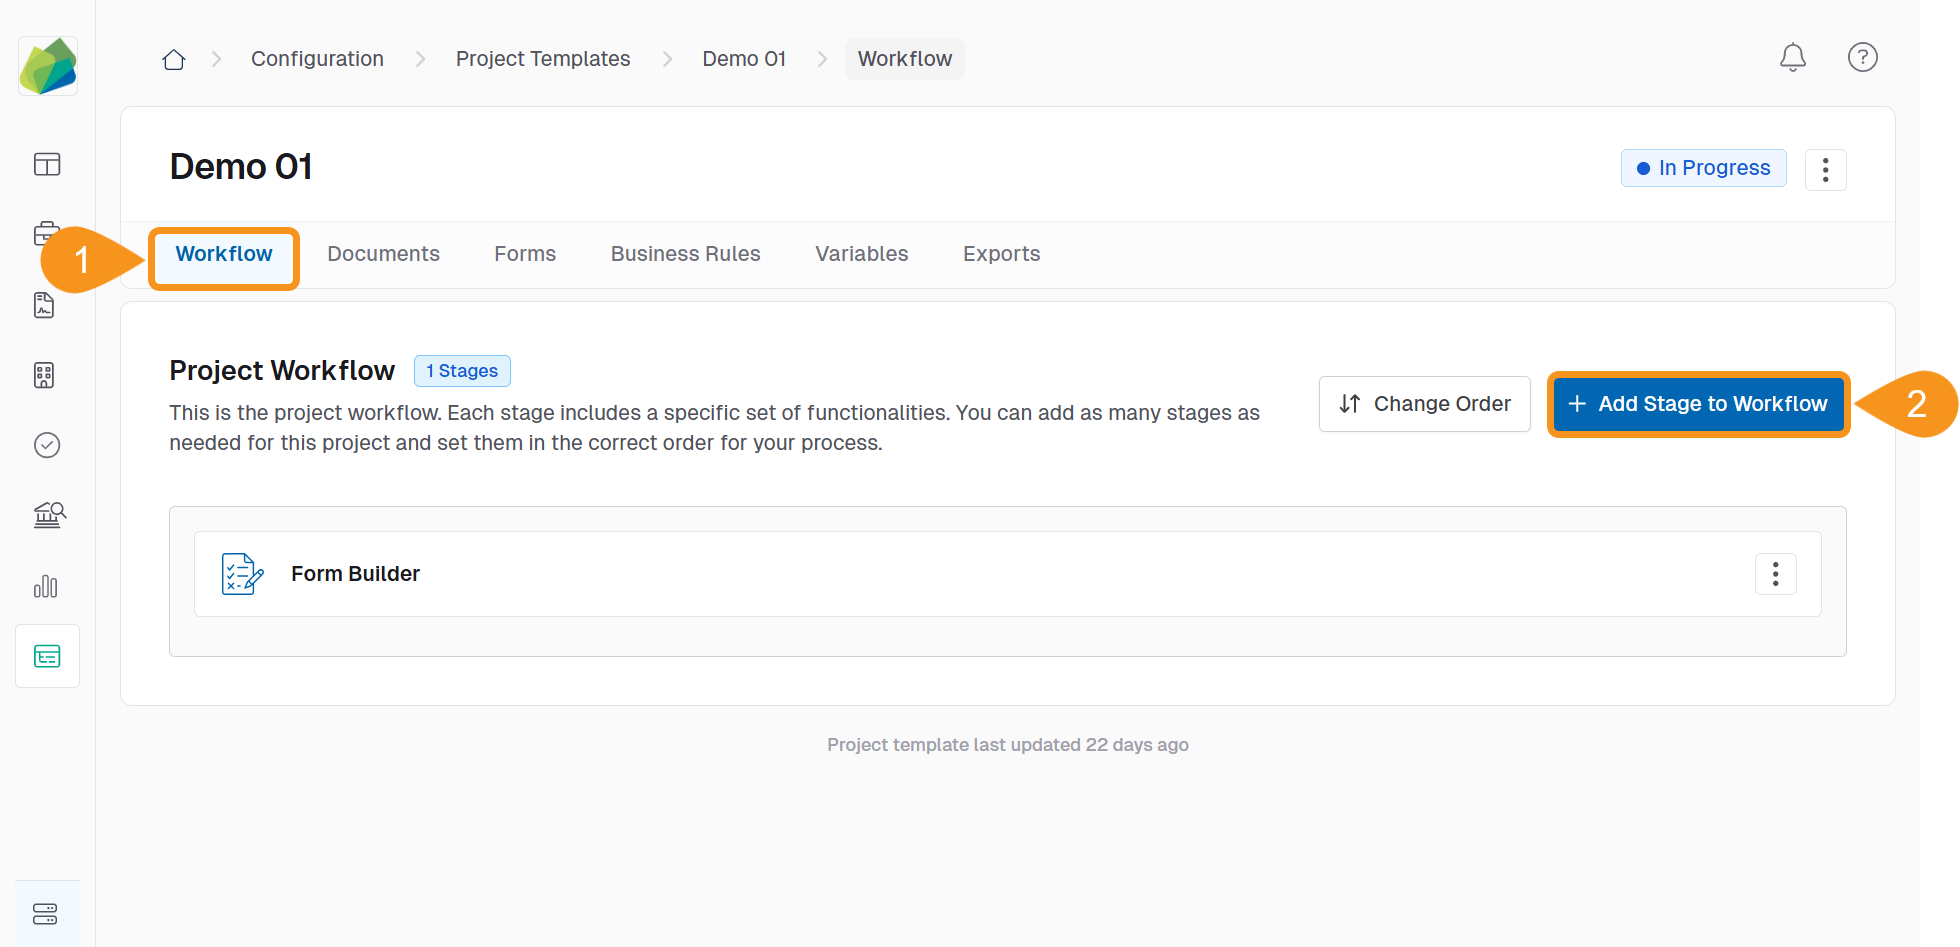
- Go to the Project Template and open the Workflow tab.
- Click Add Stage to Workflow.
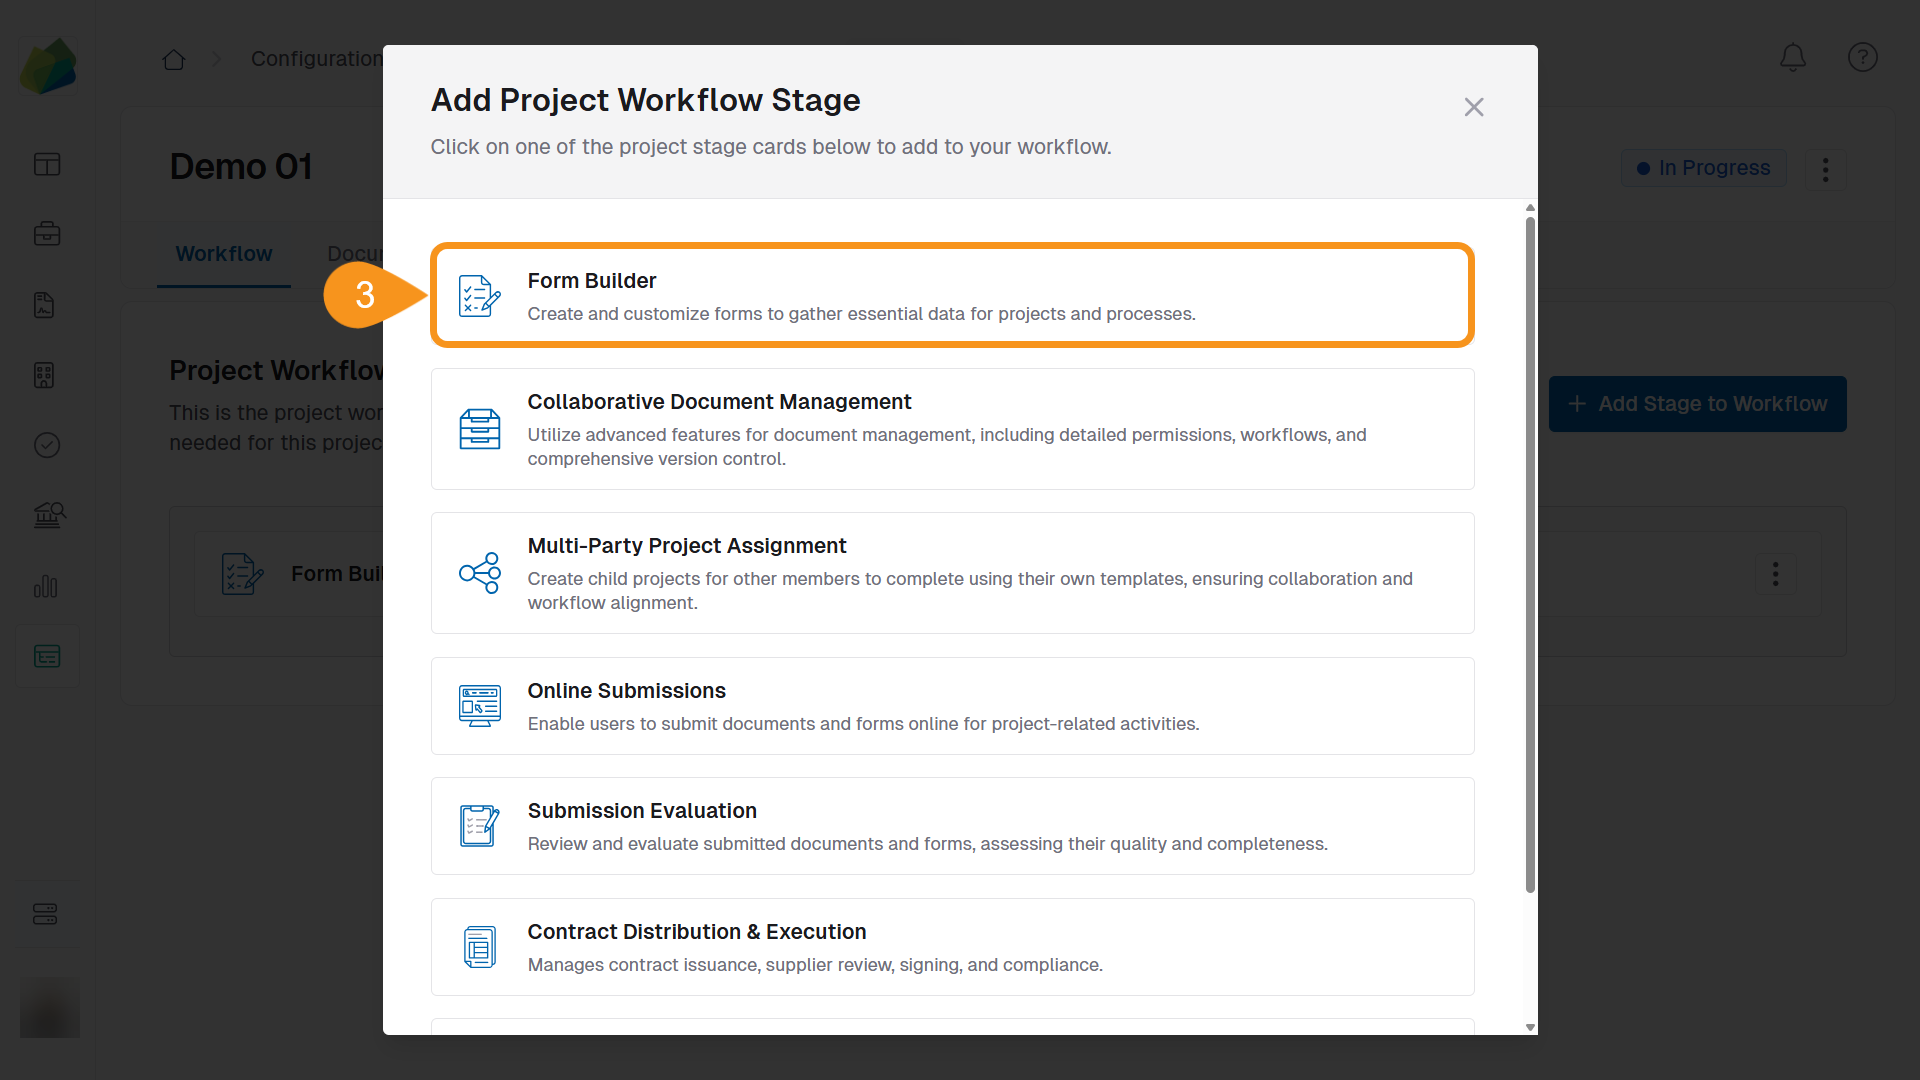
- Select Form Builder.
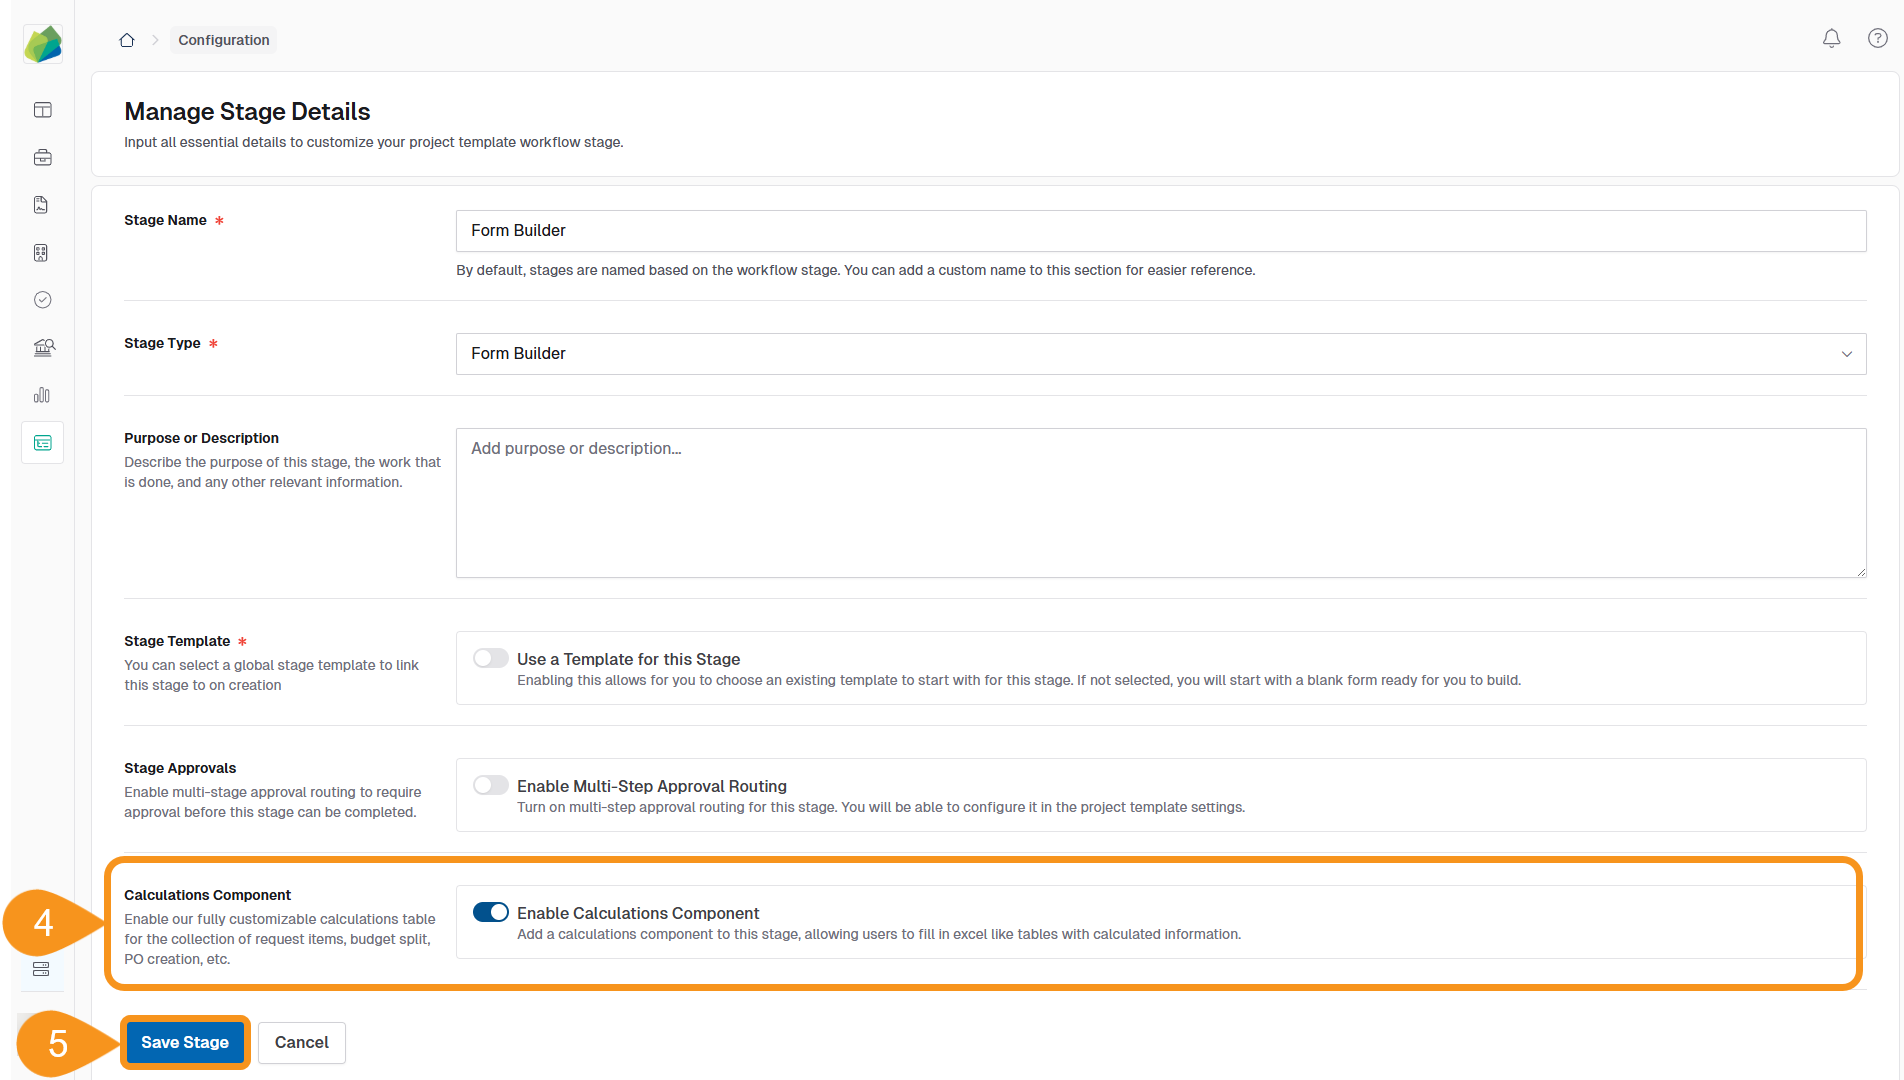
- In the stage settings panel, check Enable Calculations Component.
- Click Save Stage.
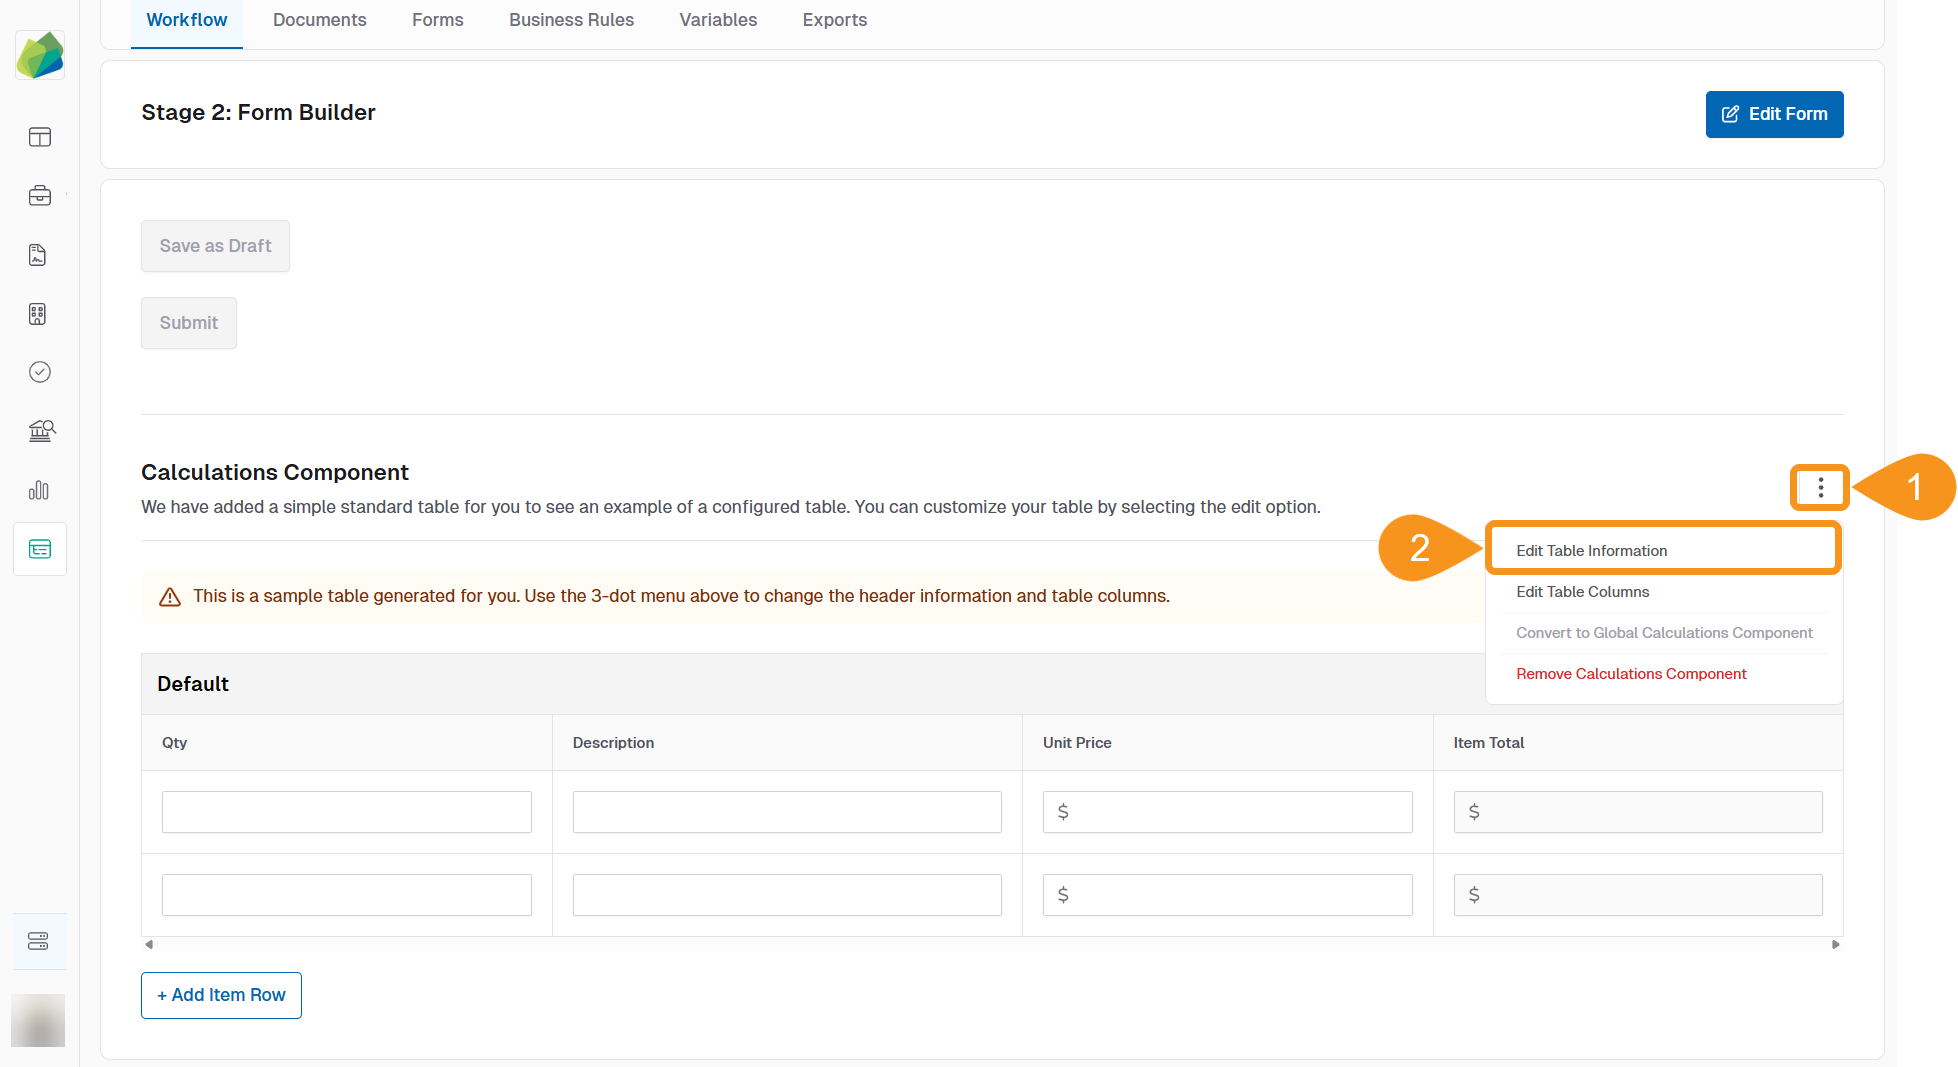
Once enabled, a Calculations Component table will appear below the form section in the Form Builder.
To Configure the Calculations Component
- Click the kebab menu next to the component.
- Select Edit Table Information.
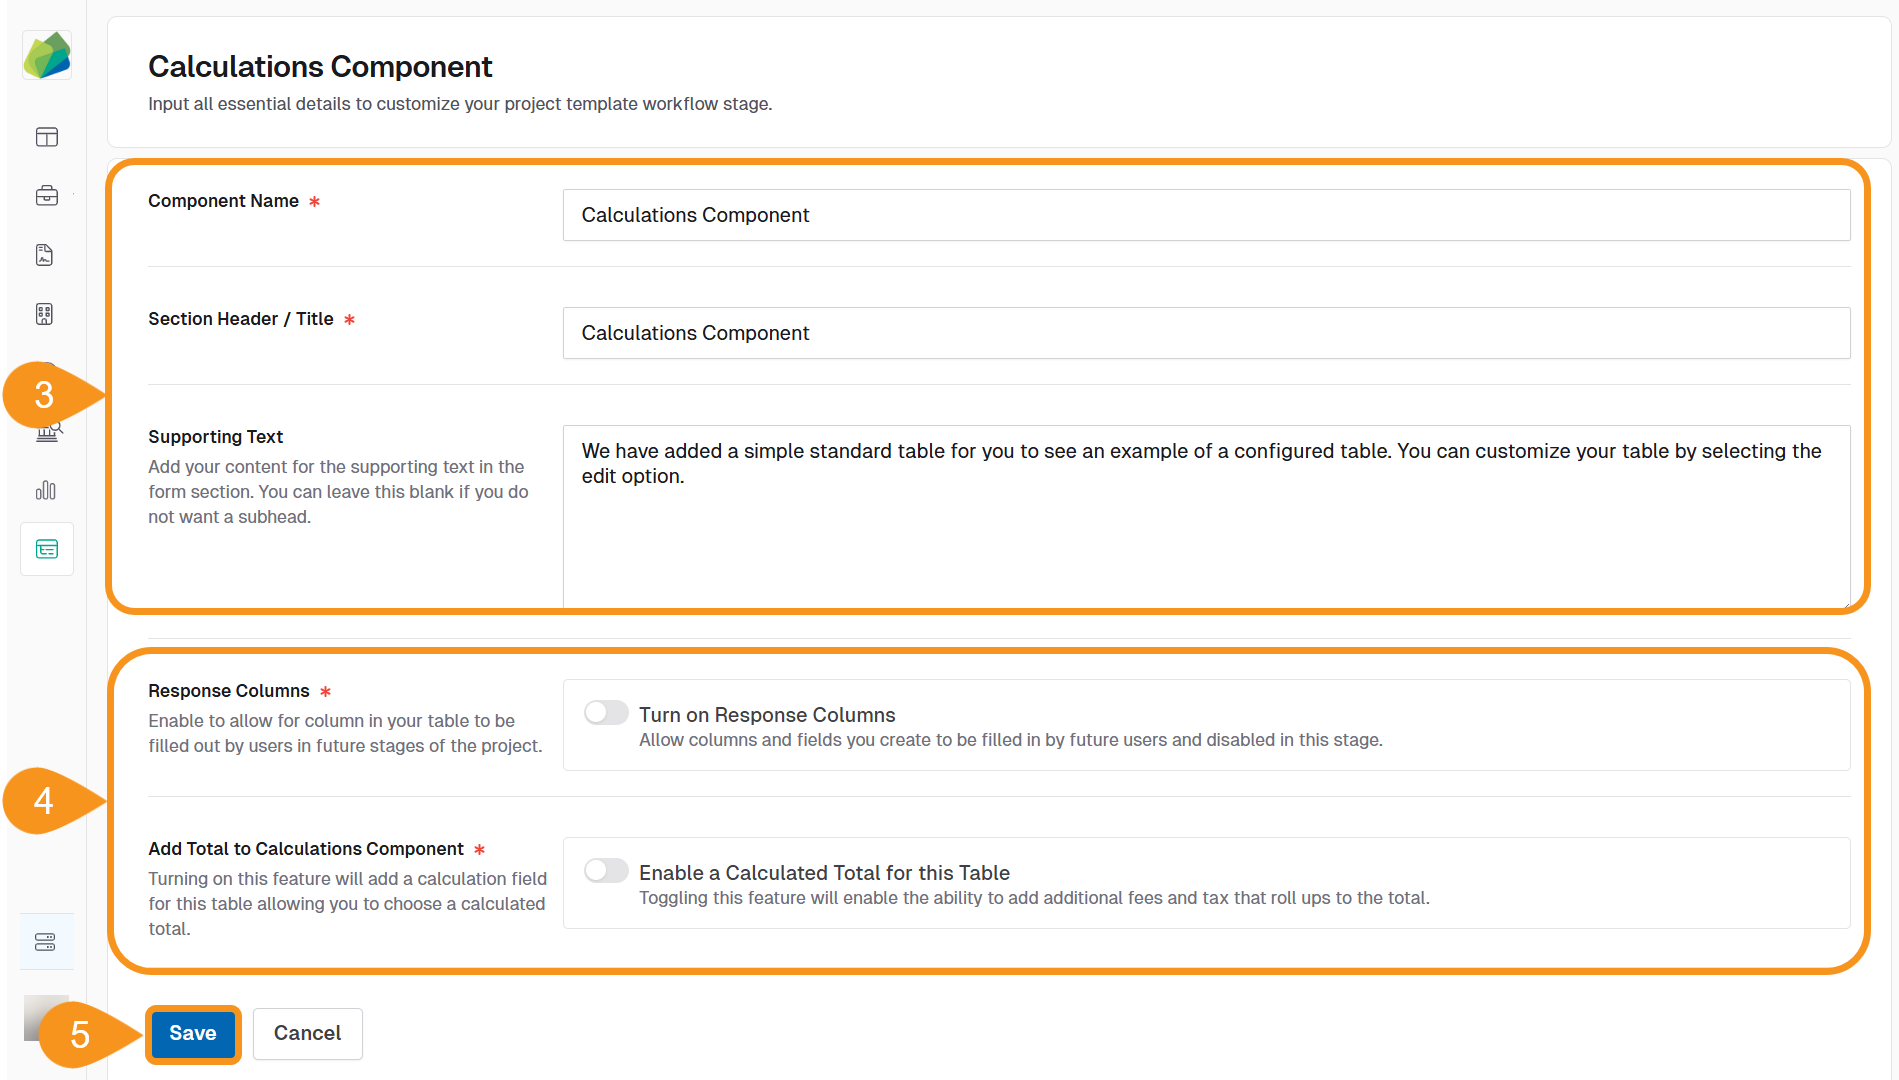
- Enter the component details:
- Component Name: Give your table a clear name (e.g., “Cost Summary”).
- Section Header/Title: This appears above the table in the form—use it to identify the section.
- Supporting Text (optional): Add a short message to help guide users as they fill out the table. Leave blank if not needed.
- Enable one or both of the following features:
- Turn on Response Columns: Allows users in later stages of the project to enter data into the table. Fields will be read-only during this setup stage.
- Enable a Calculated Total for this Table: Adds a calculation field to the table. You’ll be able to configure additional fees and taxes that are included in the total.
- Click Save to confirm your settings and open the Component Preview.
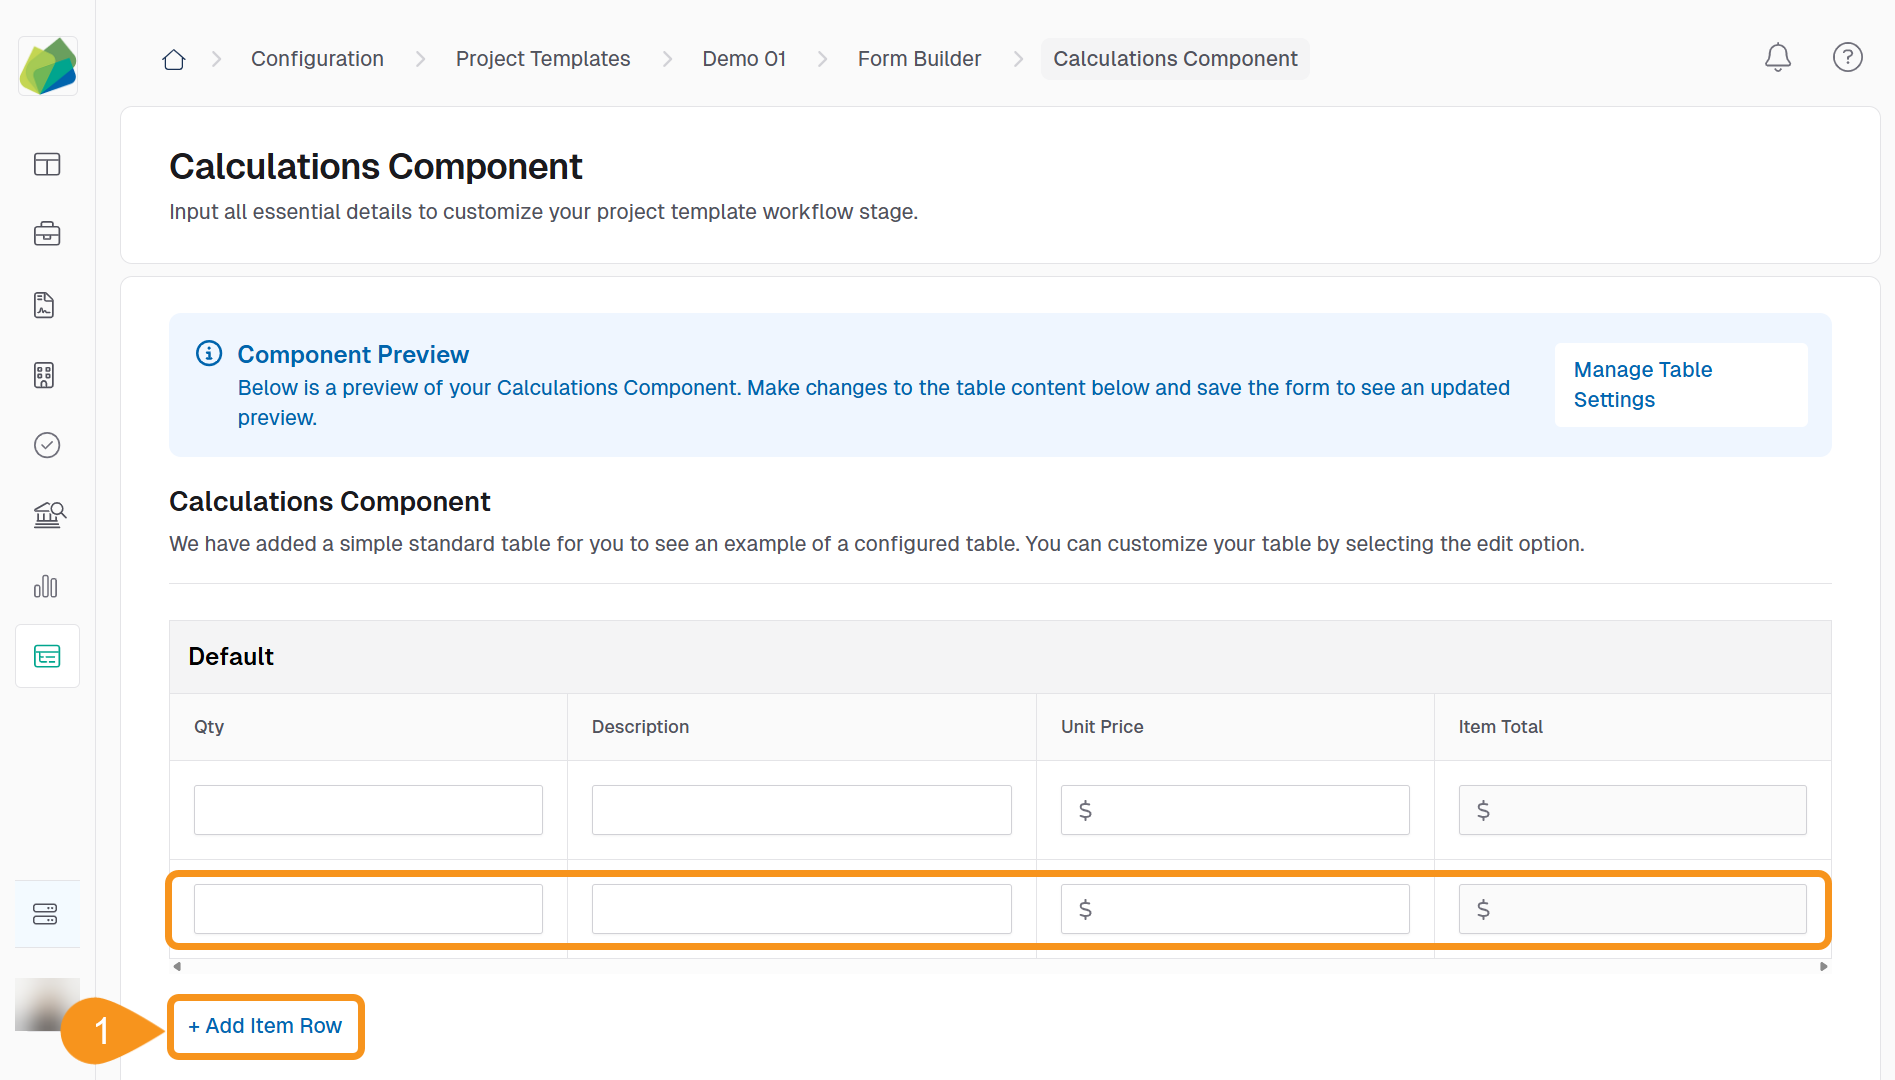
To Add Item Rows
You can add sample rows to preview how users will input data.
- In the Component Preview section, click + Add Item Row. New blank rows will appear in the preview table for configuration/testing purposes.
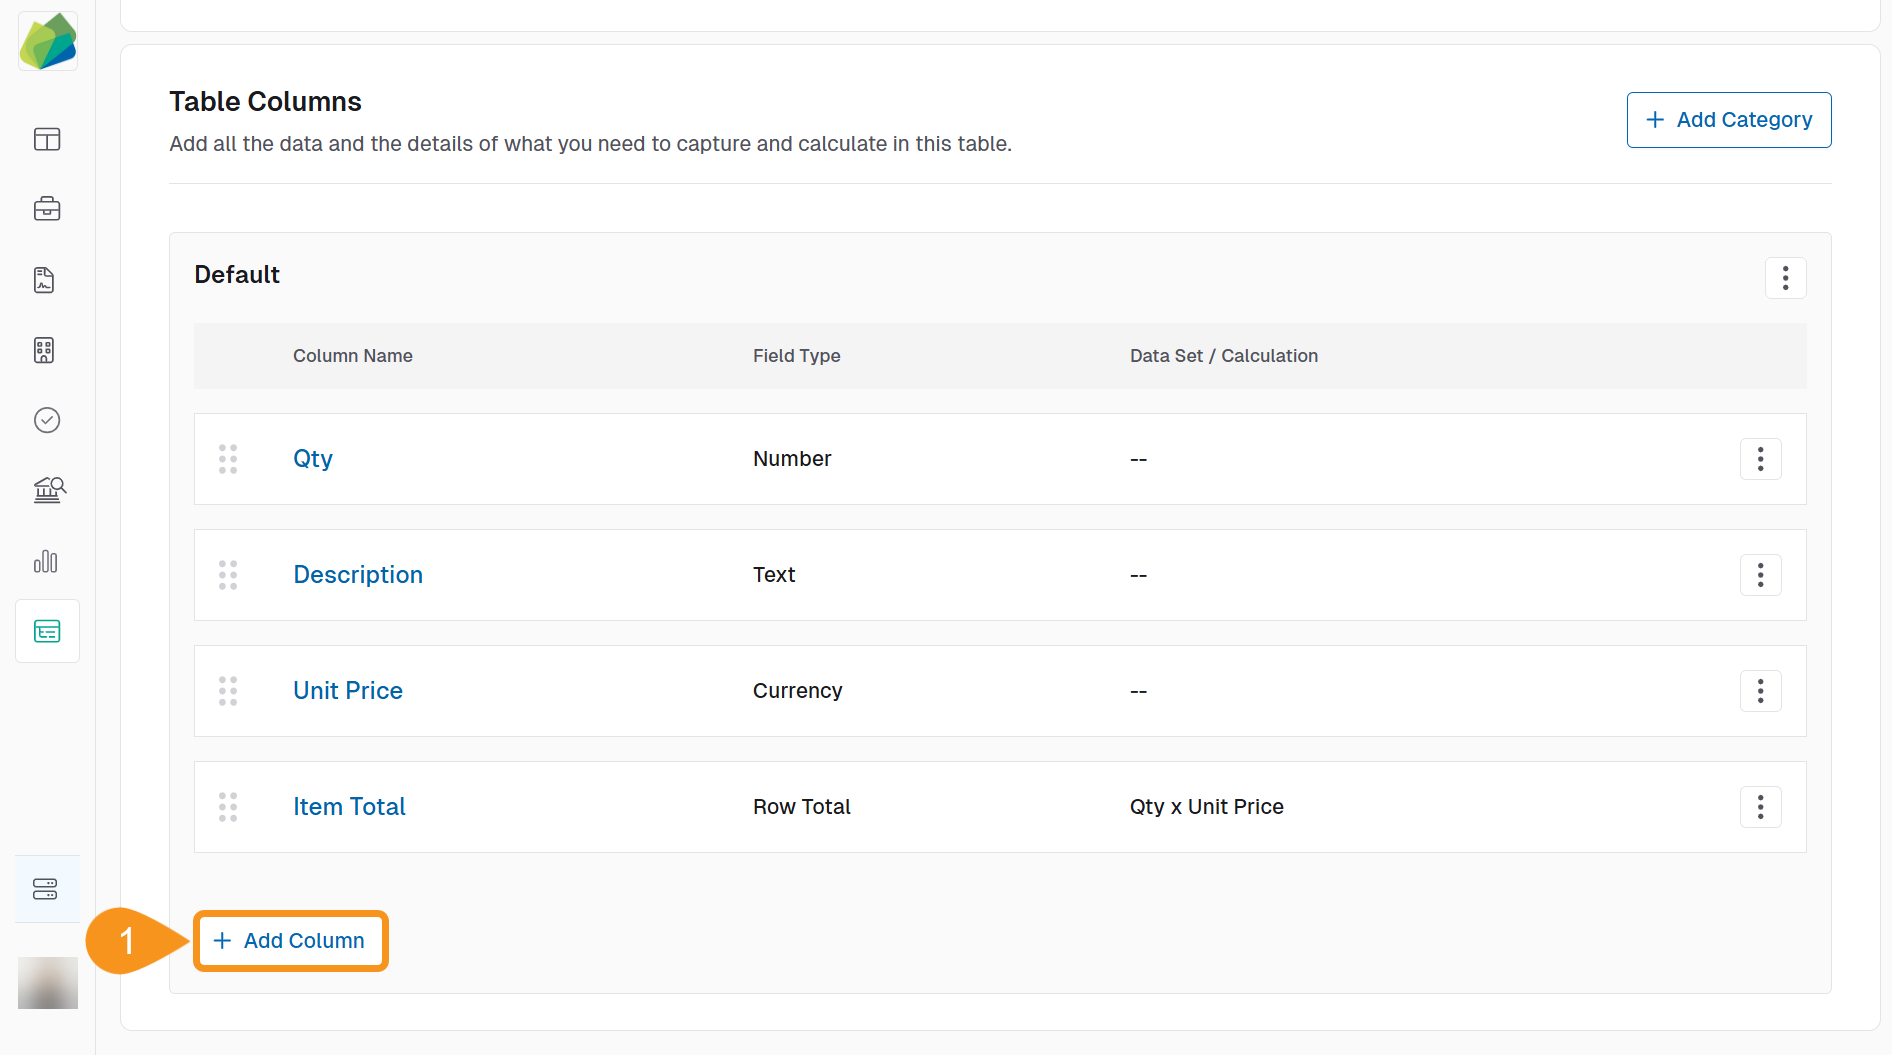
To Add and Configure Table Columns
Columns define the fields that appear in your table. You can create and configure them individually.
- In the Table Columns section, click + Add Column.
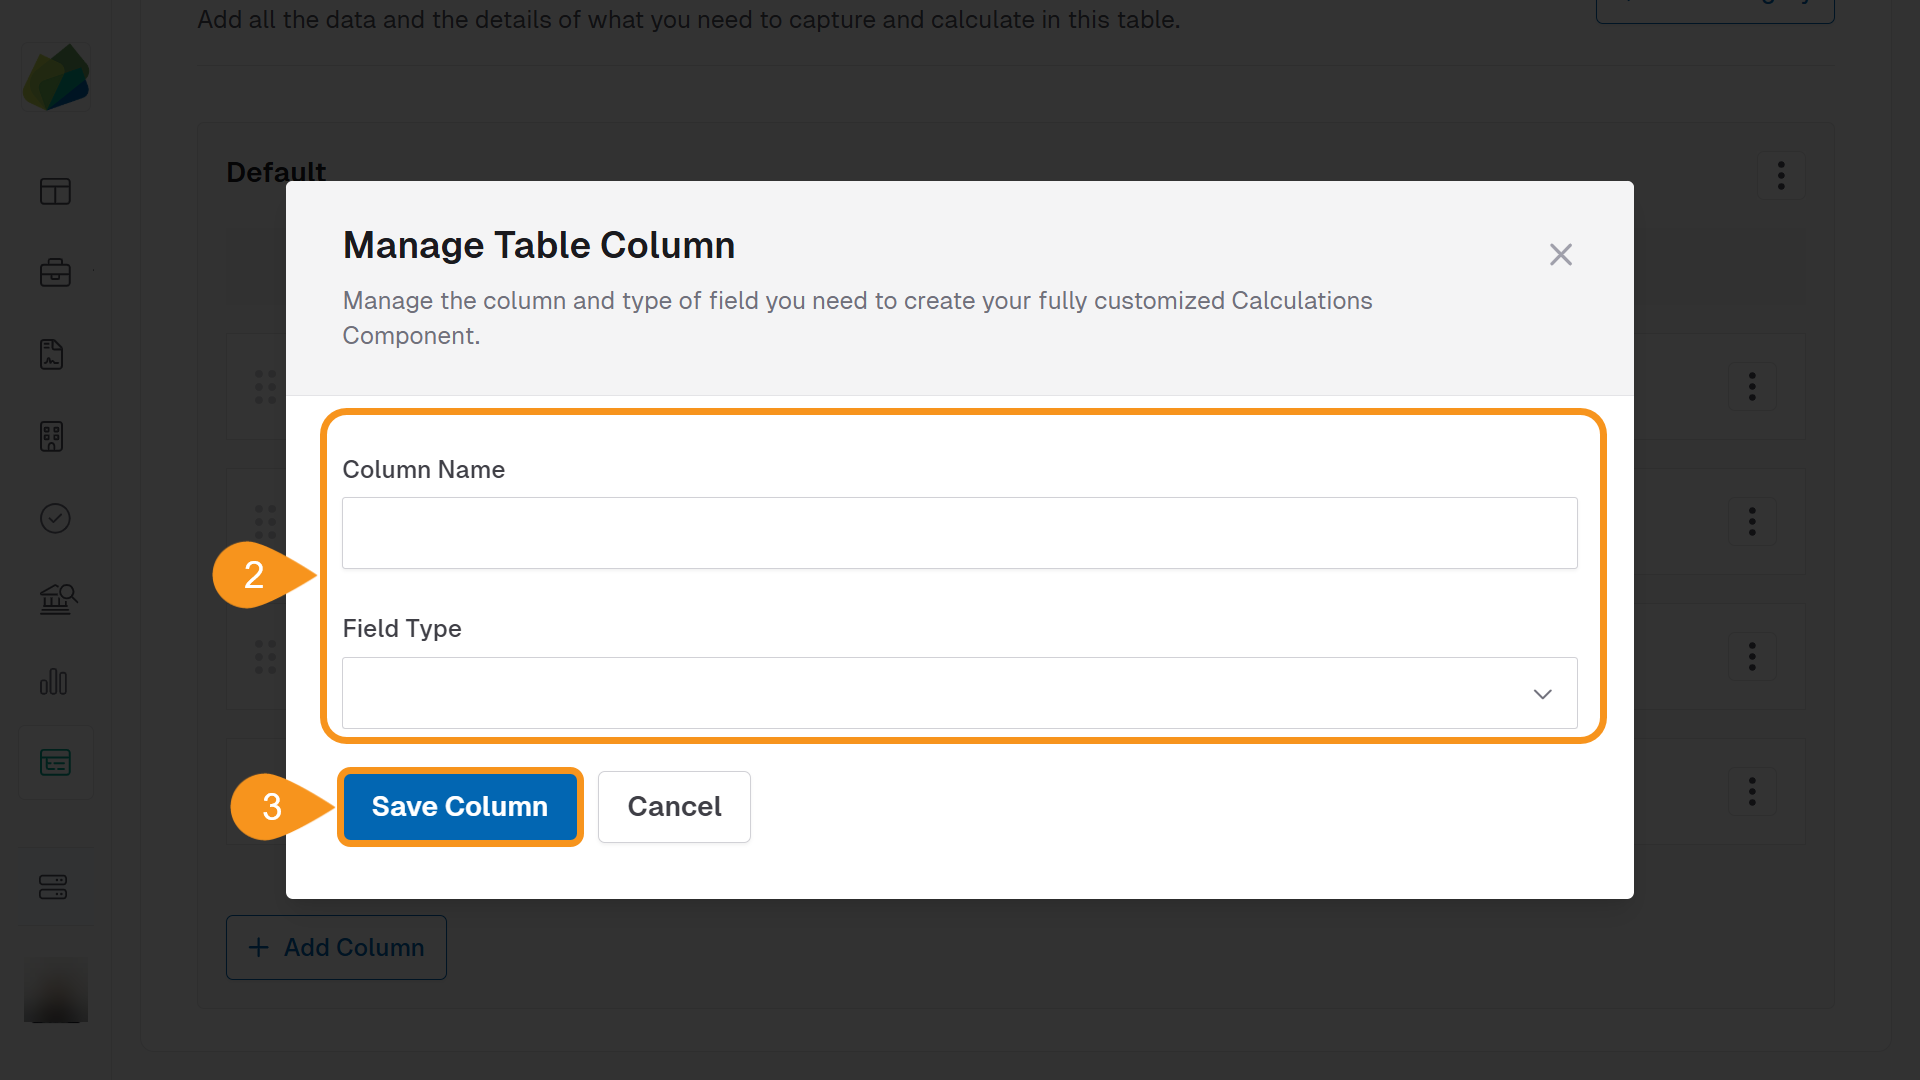
- In the Manage Table Column popup, fill in the following:
- Column Name: Give your column a descriptive title.
- Field Type: Choose the appropriate type (e.g., Number, Text, Currency, Date, Calculated).
- Click Save Column to add the column to the table.
To Manage Table Columns
- Click the kebab menu (︙) next to the column you want to modify.
- Choose one of the following options:
- Edit Column to update the column name, field type, or other settings.
- Duplicate Column to create a copy of the column.
- Remove Column to delete it from the table.

If the component is configured to support it, you may also be able to:
- Mark a column as a Responder Field
- Define Row Total Calculations
- Add Additional Costs & Fees
Once you're done, use the top navigation to return to the Form Builder stage.
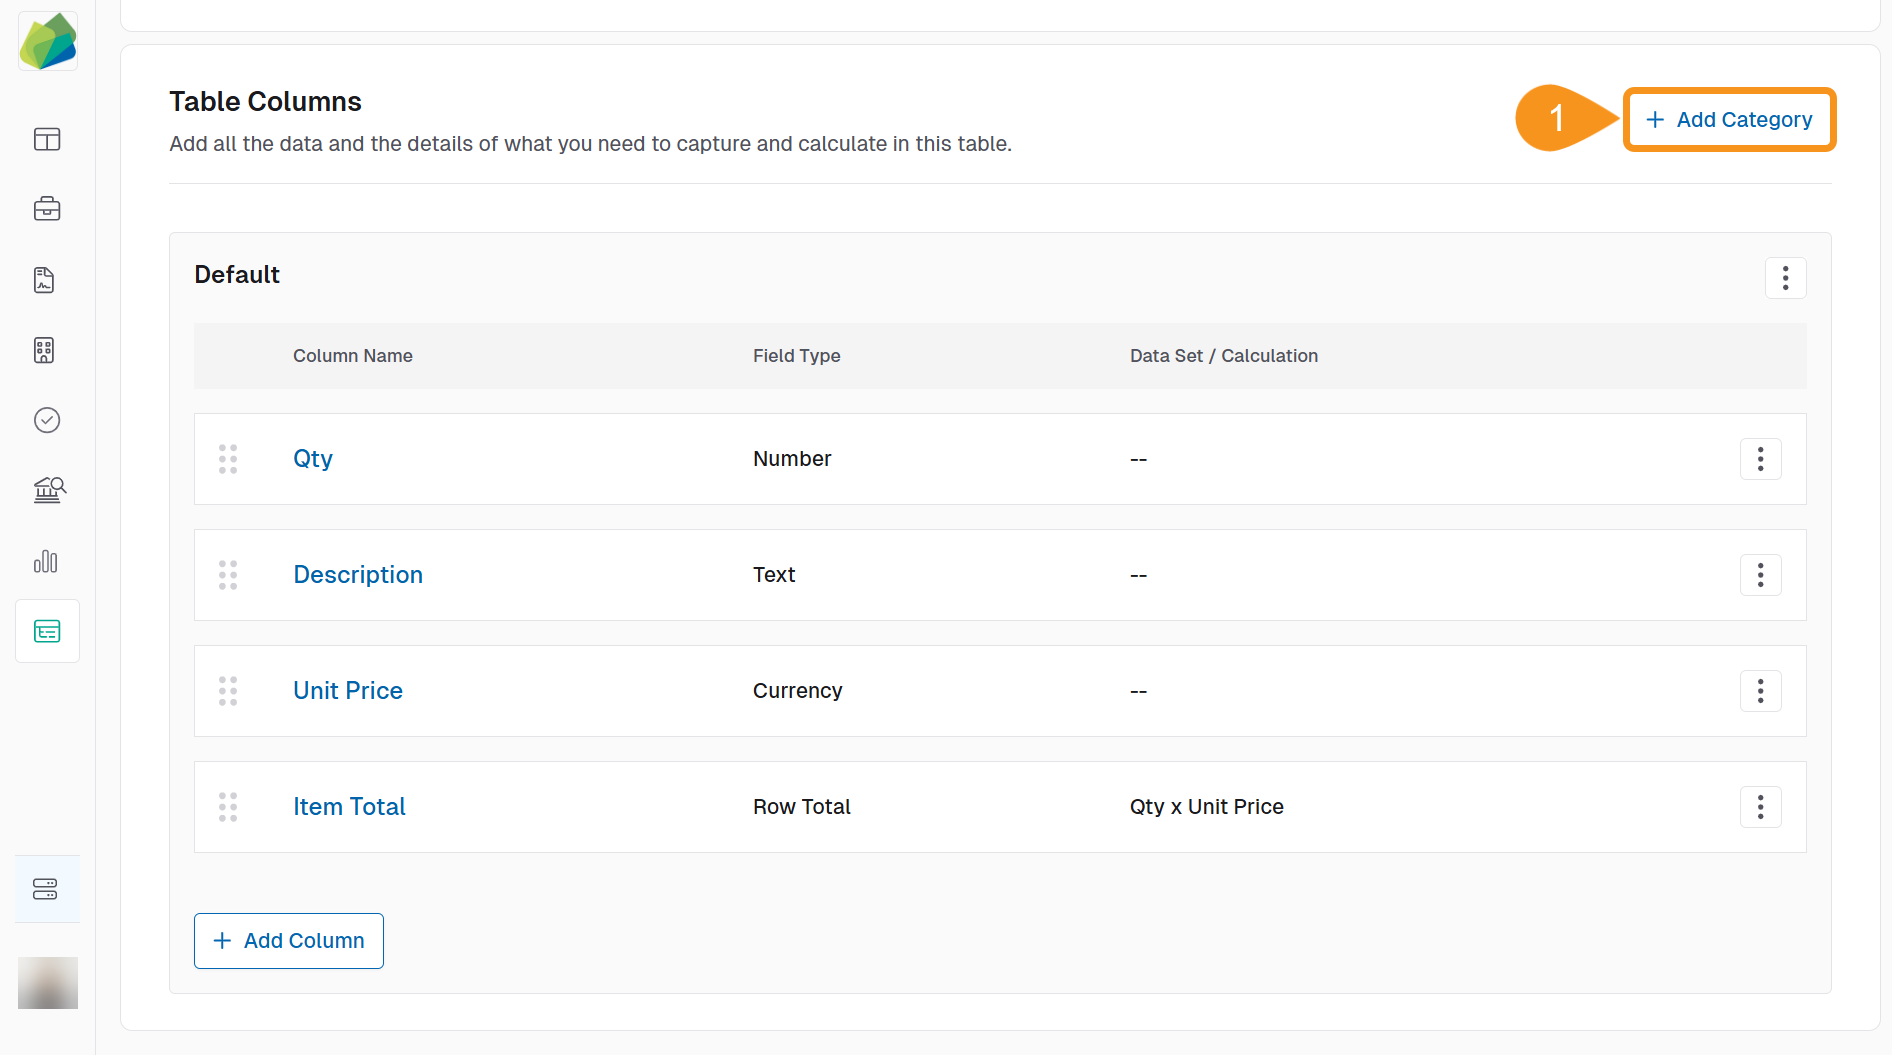
To Add Categories
Categories help you organize related columns into separate sections within the table.
- In the Table Columns section, click + Add Category.
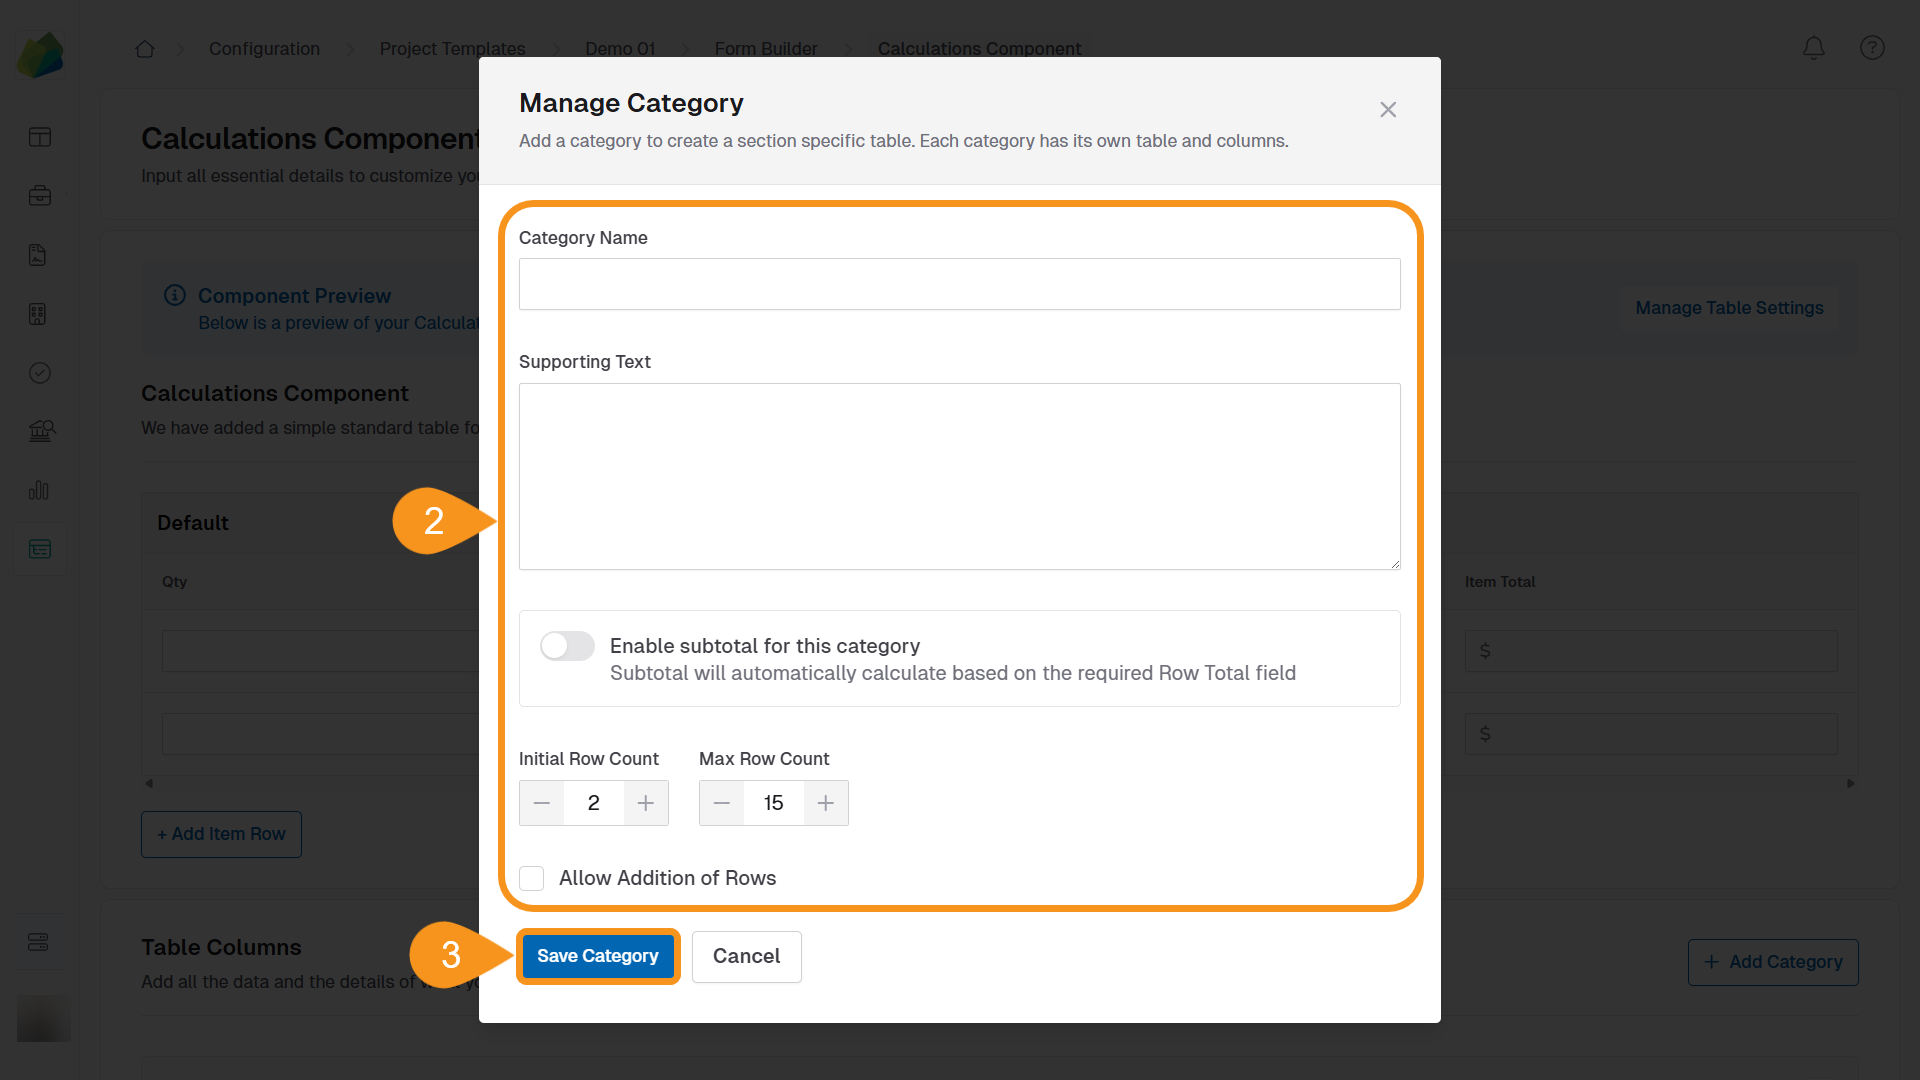
- In the Manage Category popup, complete the following fields:
- Category Name: Enter the name for the category.
- Supporting Text (Optional): Add any descriptive text to guide users.
- Enable subtotal for this category: Toggle this on if you want to automatically calculate a subtotal based on the Row Total field.
- Initial Row Count: Set how many rows should appear by default.
- Max Row Count: Set the maximum number of rows allowed in this category.
- Allow Addition of Rows: Check this if users should be able to add more rows beyond the initial count.
- Click Save Category to apply your changes.
See Also
To complement your knowledge of this process, feel free to check the following pages: